In this article, we will explore AWS Kinesis for real-time data streaming. We aim to save those real-time data into DynamoDB using a Node.JS Lambda function. The topic with the title looks like something difficult to achieve the problem. Right? Absolutely not! it’s pretty simple and will take a few minutes only to deploy our sample project. So, let’s start…
Prerequisites
Here are the following AWS services that will be required:
- DynamoDB: We will store the data in DynamoDB
- Kinesis: Will create a Kinesis Data Stream to process our real-time data
- Lambda: The Lambda function will be responsible for storing data processed data into DynamoDB.
- IAM: We will create a custom role to access Kinesis and DynamoDB for our Lambda function
- AWS-Cli Tool: To test our functionality or to send data to Kinesis we will use the AWS-Cli tool.
Steps
Let’s discuss how we can implement the functionality step by step:
- We can start with the Creation of a DynamoDB table.
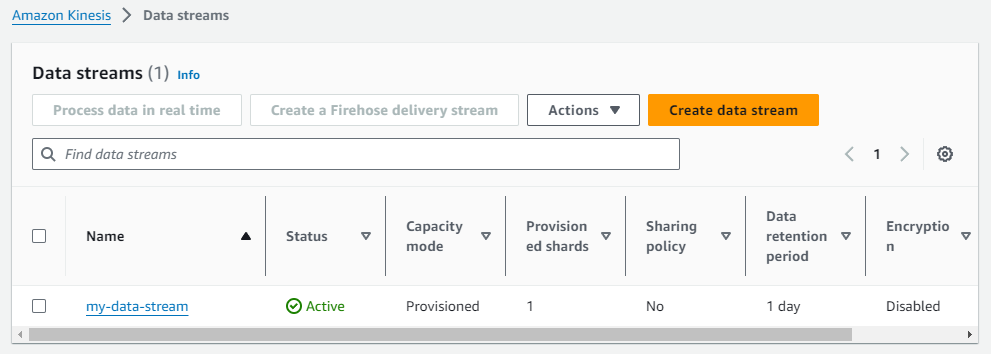
- Next, we will create a Kinesis Data Stream.
- Will create a custom role for a Lambda function. The role is to communicate with Kinesis, DyanmoDB, and CloudWatch
- Once our custom role is ready, we will create a Lambda function attaching our custom role as the permission. In this example, we are going to use NodeJS for the Lambda code.
- Finally, test our code using the AWS-Cli tool.
Let’s Create the DynamoDB Table
- Sign in to the AWS Management Console
- Browse and visit DynamoDB, a managed NoSQL database from AWS, service
- Click on the “Create Table” button
- Provide the following mandatory details:
- Set region: For this demo, we will set ‘us-east-1’
- Table Name: We will use ‘stream-data-table’ for our sample project
- Partition Key: ‘id’ with String data type will be perfect for our project.
- You can skip the remaining options and click on the “Create Table” button.
- Note the Dynamodb Table ARN (Amazon Resource Name) for role configuration.

Creating the Kinesis Data Stream
- Sign in to the AWS Management Console
- Browse and visit Kinesis, a managed service for Real-Time processing, service
- Set region: For this demo, we will set ‘us-east-1’
- Click on the “Create Data Stream” button
- Give a stream name. Eg. my-data-stream
- Choose “Provisioned” from the Data stream capacity and give “Provisioned shards” to 1. This configuration is sufficient to deploy and test our project with the least cost.
- Now click on the “Create Data Stream” button
- Note the Kinesis Data Stream ARN (Amazon Resource Name) for role configuration.

Creating the Lambda Function
- Sign in to the AWS Management Console
- Browse and visit Lambda. Lambda is a managed serverless service from AWS.
- Set region: For this demo, we will set ‘us-east-1’
- Click on the “Create Function” button
- Choose the “Author from scratch” option
- Provide the function name & choose Runtime as NodeJs 20.x
- Click on the “Create Function” button
- The function will be created with a role that can access AWS CloudWatch. However, we will edit the role in the next segment which will allow Lambda to communicate over Kinesis & DynamoDB
- Paste the following JavaScript code
Let’s Code Our Lambda Function
import { DynamoDBClient } from "@aws-sdk/client-dynamodb";
import {
  DynamoDBDocumentClient,
  PutCommand,
} from "@aws-sdk/lib-dynamodb";
const REGION = "us-east-1";
const client = new DynamoDBClient({region: REGION});
const dynamo = DynamoDBDocumentClient.from(client);
const tableName = "stream-data-table";
Importing the DynamoDB package and initializing the necessary constant variables.
export const handler = async (event) => {
  const toBeSavedItems = event['Records'].map(async (el) => {   // returning array of promises
    let key = el['kinesis']['partitionKey'];
    let data = Buffer.from(el['kinesis']['data'], 'base64').toString('utf-8');
    const params = {
      TableName: tableName,
      Item: {
        id: key,
        data: data,
      }
    };
    return saveItem(params);
  });
  await Promise.all(toBeSavedItems);  // resolving the promises
  const response = {
    statusCode: 200,
    body: JSON.stringify('Hello from Lambda!'),
  };
  return response;
};
Inside the Lambda handler function, we are looping through the Kinesis event records. Here “toBeSavedItems” is an array of promises that will save data into DynamoDB asynchronously.
async function saveItem(params) {
   try{
      await dynamo.send(
        new PutCommand(params)
      );
   } catch(err) {
     console.log(err);
   }
}
The ‘saveItem‘ function is responsible for saving data into the DynamoDB table by leveraging the DynamoDB client library.
Let’s Modify the Role for our Lambda function
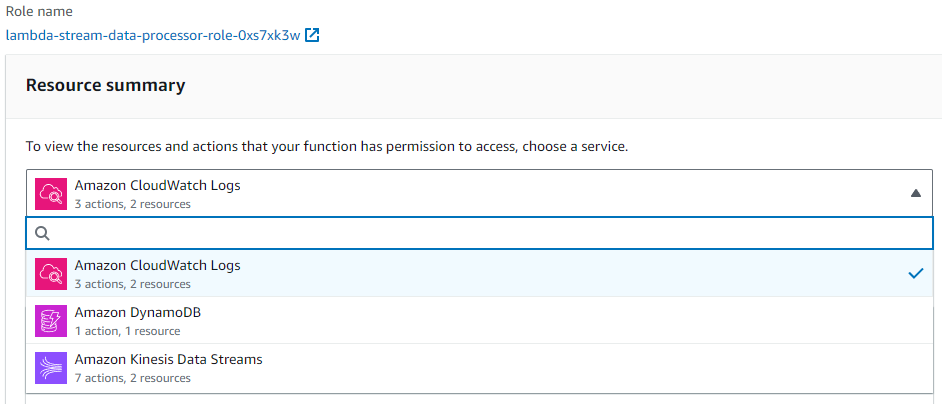
Our Lambda function will take events from Kinesis and save records into the DynamoDB table. So, naturally, the function requires access permission for both resources. Let’s give it:
- Open the lambda function
- Go to the “Configuration” Tab
- Navigate to “Execution role” from the “Permissions” menu
- Click on the role link associated with the function

- Click on the “Edit” button and it will show the Policy Editor
- Add the following statements and click on the “Next” button
		{
			"Effect": "Allow",
			"Action": [
				"kinesis:UpdateStreamMode",
				"kinesis:ListStreams",
				"kinesis:EnableEnhancedMonitoring",
				"kinesis:UpdateShardCount",
				"kinesis:DescribeLimits",
				"kinesis:DisableEnhancedMonitoring"
			],
			"Resource": "*"
		},
		{
			"Effect": "Allow",
			"Action": "kinesis:*",
			"Resource": "arn:aws:kinesis:us-east-1:842551175243:stream/my-data-stream"
		},
		{
			"Effect": "Allow",
			"Action": "dynamodb:PutItem",
			"Resource": "arn:aws:dynamodb:us-east-1:842551175243:table/stream-data-table"
}- Now, click on the “Save Changes” button from the “Review & Save” window.
- Please note you must change the ‘Resource’ / ARN with your ARNs. Your Lambda permission will look like this:

- Now go back to the Code window and Deploy the Lambda
Attaching The Kinesis Data Stream with The Lambda
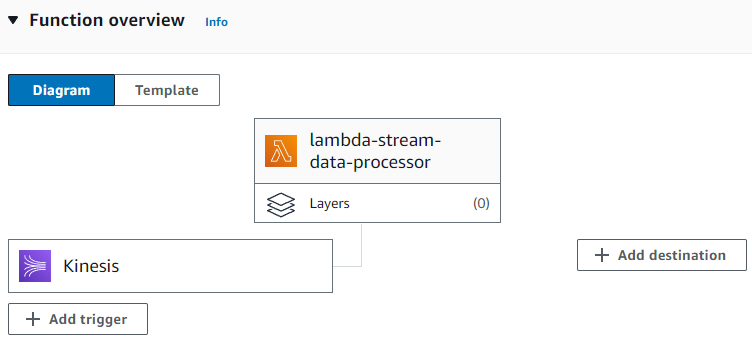
We are all set with creating our Lambda function and the Kinesis data stream. Now it’s time to attach the stream with our function. Let’s do this:
- Click on the “Add Trigger” button from the Lambda Function Overview section
- Select “Kinesis” for Trigger configuration
- Set the Stream Name. Eg. kinesis/my-data-stream
- Check “Activate trigger” on
- Set Batch Size to 5 which is sufficient for our sample project
- Click on the “Add” button

Let’s Test using AWS CLI
Open your terminal or command prompt. Paste the following command to push data to our Kinesis data stream:
aws kinesis put-record --stream-name my-data-stream --partition-key 124 --cli-binary-format raw-in-base64-out --data "HelloWorld!If everything goes successfully, the command will respond like this and save the data into the DynamoDB table:
Note. You must configure the AWS client with access keys and credentials before testing. After installing the AWS-CLI tool enter the ‘aws configure‘ command in your terminal to configure the user environment.

Conclusion
In this article, we have successfully implemented a real-time and scalable serverless sample pipeline that will ensure the ingesting of Kinesis Stream Data into DynamoDB with AWS Lambda. This serverless design framework enables consistently ingesting the streaming data, whatever the size is, and processing it effectively by leveraging AWS cloud services. One thing to note is that the role we created may not be refined. From a security perspective, you must ensure minimal access to any resources in the production environment. Soon we will extend this topic with one more implementation like how we can automate ingestion to Kinesis using S3 bucket and AWS Lambda. Stay tuned…

