In this comprehensive guide, we’ll walk you through setting up a Continuous Integration and Continuous Deployment (CICD) pipeline for your Express.js application using GitHub Action. We’ll utilize DockerHub for container image storage, AWS EC2 for hosting our application, and GitHub for version control and automation.
Prerequisites
Before we dive into the implementation, ensure that you have the following accounts set up:
Create an Express.js Application
Let’s start by creating a simple Express.js application. Follow these steps:
- Create
src.jsfile:
Inside src.js, you can define custom asynchronous functions that perform specific tasks for the GitHub Actions workflow. In this example, we are not adding any functionality, so the file will remain empty:
// src.js
// Inside src.js, you can define custom asynchronous functions that perform specific tasks for the GitHub Actions workflow.
// In this example, we are not adding any functionality, so the file will remain empty.
- Create
package.jsonfile manually or run ‘npm init’ to generate the file
// package.json
{
  "name": "express-app",
  "version": "1.0.0",
  "description": "Express.js application for GitHub Actions",
  "main": "src/index.js",
  "scripts": {
    "start": "node src/index.js"
  },
  "dependencies": {
    "express": "^4.17.1"
  }
}
- Create
index.jsfile inside the root directory:
Create a file index.js or, our express application file file inside the root directory with the following content:
// index.js
const express = require('express');
const app = express();
const port = 3000;

app.get('/', (req, res) => {
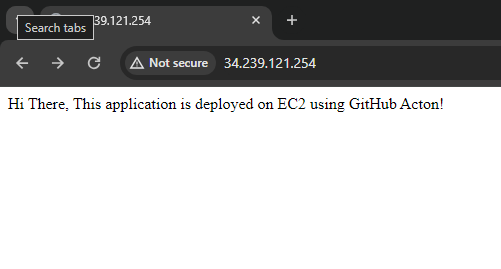
  res.send('Hi There, This application is deployed on EC2 using GitHub Action!');
});

app.listen(port, () => {
  console.log(`Example app listening on port ${port}`);
});
Now, your Express.js application code is organized inside the root directory, and the package.json file points to the index.js file as the entry point. Additionally, there is an empty src.js file in the root for demonstration purposes.
Launch EC2 Instance on AWS
Before proceeding with the setup, let’s launch an EC2 instance on AWS:
- Sign in to AWS Console:
- Navigate to the AWS Management Console.
- Sign in to your AWS account.
- Access EC2 Dashboard:
- In the AWS Management Console, navigate to the “Services” and select “EC2” under the “Compute” section.
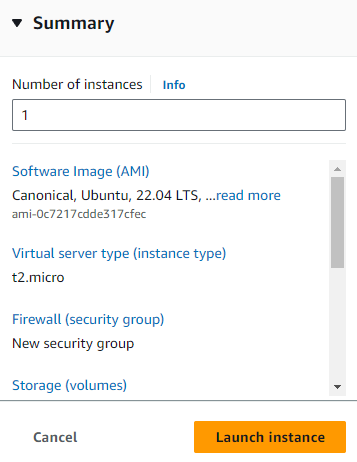
- Launch Instance:
- Click on the “Instances” in the left sidebar.
- Click the “Launch Instance” button.
- Choose an Amazon Machine Image (AMI):
- Select “Ubuntu” as the operating system for your EC2 instance.
- Choose Instance Type:
- Choose an instance type based on your requirements.
- Configure Instance:
- Configure the instance details, such as the number of instances, network settings, etc.
- Add Storage:
- Set the storage size for your instance.
- Add Tags:
- (Optional) Add tags for better organization.
- Configure Security Group:
- Create a new security group or use an existing one. Ensure that ports 22 (SSH) and 80 (HTTP) are open.
- Review and Launch:
- Review your configuration, and click “Launch.”
- Key Pair:
- Choose an existing key pair or create a new one.
- Launch Instance:
- Click “Launch Instance” to launch your EC2 instance.

Now you have launched an EC2 instance on AWS. Make a note of the public IP address or DNS of your instance, as you’ll need it for SSH access.
Continue with the Dockerfile and GitHub Action workflow as described in the next sections. The Dockerfile and GitHub Action workflow will remain unchanged as they are designed to work with the project structure, and the workflow references the index.js file for building and running the application.
Install Docker on EC2
To run Docker containers on your EC2 instance, you need to install Docker. Follow these steps:
- Connect to your EC2 Instance: Use an SSH client to connect to your EC2 instance. You’ll need the key pair associated with your EC2 instance.
ssh -i /path/to/your/key.pem ec2-user@your-ec2-instance-ip
2. Set up Docker’s repository
# Add Docker's official GPG key:
sudo apt-get update
sudo apt-get install ca-certificates curl gnupg
sudo install -m 0755 -d /etc/apt/keyrings
curl -fsSL https://download.docker.com/linux/ubuntu/gpg | sudo gpg --dearmor -o /etc/apt/keyrings/docker.gpg
sudo chmod a+r /etc/apt/keyrings/docker.gpg

# Add the repository to Apt sources:
echo \
  "deb [arch=$(dpkg --print-architecture) signed-by=/etc/apt/keyrings/docker.gpg] https://download.docker.com/linux/ubuntu \
  $(. /etc/os-release && echo "$VERSION_CODENAME") stable" | \
  sudo tee /etc/apt/sources.list.d/docker.list > /dev/null
sudo apt-get update
3. Install the docker package:
sudo apt-get install docker-ce docker-ce-cli containerd.io docker-buildx-plugin docker-compose-pluginNow, Docker is installed on your EC2 instance, and you can proceed with the remaining steps.
Create Dockerfile
To containerize the Express.js application, we need to create the Dockerfile inside the root of your project with the following content:
# Dockerfile
FROM node:alpine
WORKDIR /usr/src/app
COPY package*.json ./
RUN npm ci
COPY . .
CMD ["npm", "start"]
This Dockerfile sets up a Node.js environment, installs the application dependencies, and defines the command to start the Express.js application.
GitHub Action Workflow
Create a .github/workflows directory within your application and place a file named cicd.yml inside it. Copy and paste the following content into cicd.yml:
# .github/workflows/cicd.yml
name: CICD Using GitHub Action

on:
  push:
    branches:
      - master

jobs:
  build:
    runs-on: ubuntu-latest
    strategy:
      matrix:
        node-version: [14.x]

    steps:
      - uses: actions/checkout@v2
      - name: Using NodeJS
        uses: actions/setup-node@v1
        with:
          node-version: ${{ matrix.node-version }}
      - name: NPM Install & build
        run: |
          npm install
          npm run build

        env:
          CI: true

  dockerPublish: #creating Docker image & pushing into Docker Hub
    runs-on: ubuntu-latest
    steps:
      -
        name: Set up QEMU
        uses: docker/setup-qemu-action@v2
      -
        name: Set up Docker Buildx
        uses: docker/setup-buildx-action@v2
      -
        name: Login to Docker Hub
        uses: docker/login-action@v2
        with:
          username: ${{ secrets.DOCKERHUB_USERNAME }}
          password: ${{ secrets.DOCKERHUB_TOKEN }}
      -
        name: Build and push
        uses: docker/build-push-action@v3
        with:
          push: true
          tags: prodocker21/cicd-test1

  cleanDocker: #stopping and deleting existing/running containers
    needs: [build]
    runs-on: ubuntu-latest

    steps:
    - name: SSH deploy
      uses: appleboy/ssh-action@master
      with:
          host: ${{ secrets.HOST_IP }}
          username: ${{ secrets.HOST_USERNAME }}
          key: ${{ secrets.HOST_SSH_PRIVATE_KEY }}
          port: ${{ secrets.HOST_SSH_PORT }}
          script: |
            docker kill $(docker ps -q)
            docker rm $(docker ps -a -q)
            docker rmi prodocker21/cicd-test1

  deployDocker: #running the locally built Docker image on the host
    needs: [build]
    runs-on: ubuntu-latest

    steps:
    - name: SSH deploy
      uses: appleboy/ssh-action@master
      with:
          host: ${{ secrets.HOST_IP }}
          username: ${{ secrets.HOST_USERNAME }}
          key: ${{ secrets.HOST_SSH_PRIVATE_KEY }}
          port: ${{ secrets.HOST_SSH_PORT }}
          script: |
              mkdir /home/ubuntu/cicd
              cd /home/ubuntu/cicd
              docker login --username ${{ secrets.DOCKERHUB_USERNAME }} --password ${{ secrets.DOCKERHUB_TOKEN }}
              docker pull <your-docker-ac-name>/cicd-test1
              docker run -d -p 80:3000 <your-docker-ac-name>/cicd-test1
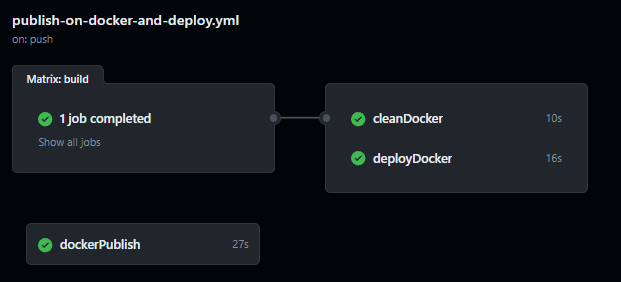
This GitHub Actions workflow defines the CICD pipeline for your Express.js application. It includes the build job, Docker image publishing job, Docker cleanup job, and the final deployment job.
Explanation of the GitHub Action Workflow
The GitHub Actions workflow file orchestrates the CICD pipeline for your Express.js application. The name field provides a descriptive name for the workflow, and the on section specifies the triggering conditions, in this case, running on every push event to the master branch.
The workflow comprises several jobs, each responsible for a specific aspect of the CICD pipeline.
Build Job
The build job is designed to build the Node.js application. It runs on the latest version of the Ubuntu operating system and employs a build matrix to test against multiple Node.js versions. The job includes steps to check out the repository code, set up Node.js, and install dependencies using npm.
Docker Publishing Job
The dockerPublish job is tasked with creating a Docker image and pushing it to Docker Hub. It runs on the latest version of the Ubuntu operating system and involves several steps. These steps set up QEMU and Docker Buildx, log in to Docker Hub using provided secrets for authentication, and finally build and push the Docker image to the specified repository on Docker Hub.
Clean Docker Job
The cleanDocker job is responsible for stopping and deleting existing or running Docker containers. It runs on the latest version of the Ubuntu operating system and is dependent on the successful completion of the build job. The job utilizes an SSH action to connect to the specified EC2 instance, where it issues commands to stop and remove Docker containers and images.
Deploy Docker Job
The deploy Docker the job focuses on running the locally built Docker image on the host, providing the final deployment step. It runs on the latest version of the Ubuntu operating system and is dependent on the successful completion of the build job. Similar to the cleanDocker job, it uses an SSH action to connect to the specified EC2 instance. The job involves creating a directory, changing it, logging in to Docker Hub, pulling the Docker image, and running it on the host.
Setting Up GitHub Action Secrets
To securely manage sensitive information required during the workflow, GitHub provides a feature called Secrets. These secrets are essential for secure authentication and access to external services.
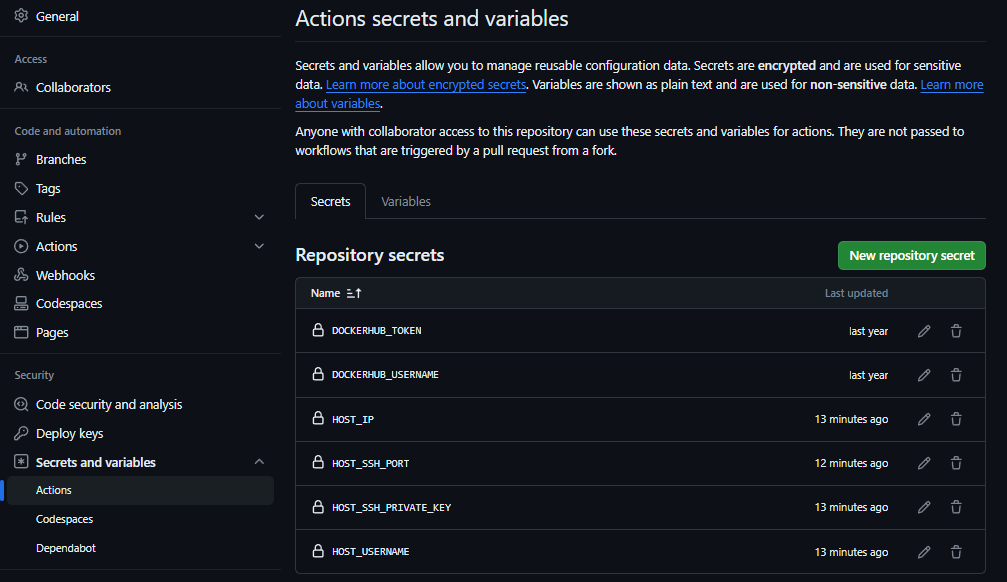
The workflow relies on secrets for DockerHub (username and token) and EC2 (host, username, SSH key, and SSH port). These secrets are securely stored in the GitHub repository settings and accessed within the workflow for authentication and deployment operations.
Adding DockerHub Secrets:
- On GitHub, go to your repository and navigate to “Settings” > “Secrets” > “New repository secret.“
- Create the following secrets:
- DOCKERHUB_USERNAME: Your DockerHub username
- DOCKERHUB_TOKEN: Access token generated from DockerHub
Adding EC2 Secrets:
- On GitHub, go to your repository and navigate to “Settings” > “Secrets” > “New repository secret.“
- Create the following secrets:
- HOST_IP: Public IP of the EC2 instance
- HOST_SSH_PORT: SSH port of your EC2 instance
- HOST_SSH_PRIVATE_KEY: contents of your private key file
- HOST_USERNAME: EC2 username

Now, your GitHub repository is configured with the necessary secrets for the GitHub Actions workflow. These secrets will be securely used in the workflow to deploy your Express.js application on your EC2 instance and push Docker images to DockerHub.
Application Deployment using GitHub Action
We have done every step to deploy the application on the EC2 instance using the GitHub action. All you need to push the code into GitHub inside the ‘master‘ branch. Upon committing the code changes to the ‘master’ branch, the cicd.yml workflow will execute automatically. It will take a few minutes to deploy and you can see the workflow steps inside the ‘Action’ tab.


Once, the workflow completes you can visit the application using the IP address.

Conclusion
Congratulations! You’ve successfully set up a CICD pipeline for the Express.js application using GitHub Action, Docker, DockerHub, and AWS EC2. With this automated workflow, your application will be built, containerized, and deployed to your EC2 instance whenever changes are pushed to the master branch. This streamlined process enhances efficiency and ensures a seamless development pipeline.
Remember to keep your secrets confidential, and regularly review and update your CICD pipeline to adapt to evolving project requirements. Happy coding!

