Managing and processing data efficiently is crucial for businesses to make informed decisions in today’s data-driven world. AWS provides a powerful combination of services for managing data, including S3 for scalable storage, AWS Lambda for serverless computing, and Amazon DynamoDB for NoSQL database capabilities. In this article, let’s deep dive into a practical example that covers a pipeline creation that will detect new JSON file upload over Amazon S3 and save the file contents into AWS Dynamodb automatically. So, let’s begin…
Prerequisites
This project will use the following AWS services:
- AWS Lambda: The serverless and managed computing service by AWS
- CloudWatch: Log & service monitoring tool
- IAM: Identity and Access Management
- Amazon S3: Managed Storage Service from Amazon Web Services
- DynamoDB: Managed NoSQL database
Steps
Before jumping into the problem-solving, let’s summarize how we will create the pipeline.
- Firstly, we will create a DynamoDB table that will be used to store the s3 content.
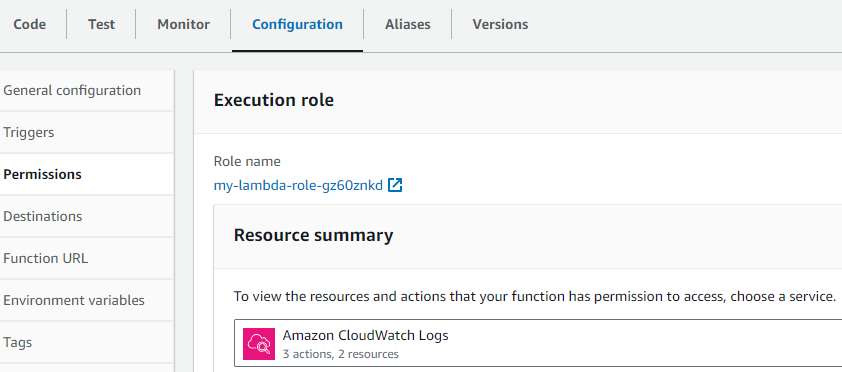
- Then, will create a Lambda function (NodeJS 20 runtime) with a default execution role that allows the Lambda to access & log over CloudWatch. Later, we will update the role accordingly. Additionally, we will use AWS JavaScript v3 SDK for our Lambda code.
- Next, it’s time to create the S3 bucket and add an event trigger to our lambda function
- We will then, update the role attached with the Lambda function. The new role will allow our Lambda function to access the S3 bucket, AWS CloudWatch & the Dyanamodb Table.
- Finally, we will test the pipeline using a JSON upload to s3. Sounds interesting! Right? Let’s start…
Step 1: Creation of the DynamoDB Table
- Sign in to the AWS Management Console
- Visit the DynamoDB service and set the region. We will select ‘ap-south-1’ for this project.
- Click on the “Create Table” button
- Provide the following mandatory details:
- Give the table name. Eg. ‘my-users-data‘
- Set ‘id’ for the partition key and the type will be String.
- You can create a Sort Key named ‘email‘ as we will store the user’s data. Alternatively, you can skip adding the sort key and, create a GSI (Global Secondary index) and make the email field the partition key. The reason behind making the ’email’ field indexed, it will help us query data using email ID instead of document scan. Note. opting GSI option will cost more and the consistency will be eventual.
- You can skip the remaining options and click on the “Create Table” button.
- Note the Dynamodb Table ARN (Amazon Resource Name) for the Lambda role configuration.

Step 2: Let’s create the Lambda function
- Sign in to the AWS Management Console
- Visit the AWS Lambda service and set the region to ‘ap-south-1’ for this project.
- Click on the ‘Create a function’ button
- Select ‘Author from scratch’ and give the following function details:
- Function name: The Lambda function. In our project, we will set ‘my-lambda’.
- Set the runtime to ‘Node.js 20.x‘ or greater
- Now, click on the ‘Create Function’ button.
- We have completed the Lambda function creation. The function is attached with a default execution role that can access the CloudWatch service only. Now, it’s time to add a s3 trigger to our lambda function. Let’s do this now. Later, we will jump into the Node.Js lambda code part.

Step 3: Creating the Amazon S3 Bucket for File Storage
- Sign in to the AWS Management Console
- Visit the S3 service and set the region to ‘ap-south-1’ for this project.
- Click on the ‘Create Bucket’ button and provide the bucket name. Eg. s3-test-bucket-25. Note. you must provide a unique name for the S3 bucket. Because the s3 bucket name must be globally unique. You can skip the remaining configurations.
- Click on the ‘Create Bucket’ button
- Note the ARN attached with the s3 bucket.
- Now, we have the s3 ready with us. Let’s add an event to the bucket:
- Open the bucket and browse the ‘Properties’ tab.
- Click on ‘Create Event Notification‘ from the Event Notifications group
- Give an event name. Eg. my-event-to-lambda
- We will add a ‘Suffix – optional’ of .json as our lambda will only read JSON files.
- From the Event types group select ‘Put / s3:ObjectCreated:Put‘. For our project ‘Put‘ is sufficient.
- Select Destination as the Lambda function and select the Lambda function we have created from the dropdown list.
- Finally, click on the ‘Save Changes’ button.

Step 4: Update the Lambda Execution Role
Our Lambda function will take events from S3 putObject and save records into the DynamoDB table. So, the function will require access permission for both resources for s3 and Dynamodb. Let’s give it:
- Open the lambda function
- Go to the “Configuration” Tab
- Navigate to “Execution role” from the “Permissions” menu
- Click on the role link associated with the function

- Click on the “Edit” button and it will show the Policy Editor
- Add the following statements and click on the “Next” button
{
	"Version": "2012-10-17",
	"Statement": [
		{
			"Effect": "Allow",
			"Action": "logs:CreateLogGroup",
			"Resource": "arn:aws:logs:ap-south-1:842551175243:*"
		},
		{
			"Effect": "Allow",
			"Action": [
				"logs:CreateLogStream",
				"logs:PutLogEvents"
			],
			"Resource": [
				"arn:aws:logs:ap-south-1:842551175243:log-group:/aws/lambda/my-lambda:*"
			]
		},
		{
			"Effect": "Allow",
			"Action": [
				"s3:GetObject",
				"s3:PutObject"
			],
			"Resource": "arn:aws:s3:::s3-test-bucket-25"
		},
		{
			"Effect": "Allow",
			"Action": [
				"dynamodb:PutItem"
			],
			"Resource": "arn:aws:dynamodb:ap-south-1:842551175243:table/my-users-data"
		}
	]
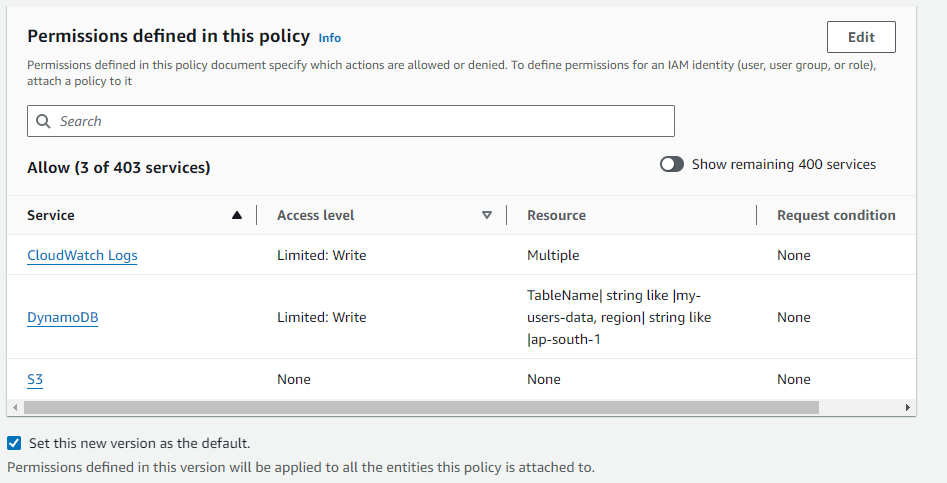
}- The permission will look like this

- Now, click on the “Save Changes” button from the “Review & Save” window. With the upper-mentioned statements, we have given limited access to our Lambda function for the S3 bucket and the DynamoDB table. It is always recommended that you should start with the least access. In our statement definition, we have added the resource ARN that will ensure the lambda won’t impact any other resources.
- Please note you must change the ‘Resource’ / ARN with your ARNs.
- So, we are done with the Lambda Role Modification. Let’s move to our next step i.e. write the Lambda code using NodeJS. Please note there are multiple ways you can give permissions to AWS resources. In this example, we have done that using lambda role modification for to sake of simplicity.
Step 5: Let’s Code Our Lambda Function
We have come across the most exciting segment i.e. code the lambda using the NodeJS and AWS v3 JS sdk.
import { S3Client, GetObjectCommand } from "@aws-sdk/client-s3";
import { DynamoDBClient } from "@aws-sdk/client-dynamodb";
import { DynamoDBDocumentClient, PutCommand } from "@aws-sdk/lib-dynamodb";
import uniqid from 'uniqid';

const allowedBuckets = ['s3-test-bucket-25'];
const region = 'ap-south-1';
const s3Client = new S3Client({ region: region });

const client = new DynamoDBClient({region: region});
const dynamo = DynamoDBDocumentClient.from(client);
Importing the dependencies including client-s3, lib-dynamodb from aws-sdk and uniqueid. We will use uniqueid library to generate user’s unique id. You can use ‘npm i uniqueid‘ to install the dependency.
async function saveUser(userinfo) {
  const tableName = "my-users-data";
  userinfo['id'] = uniqid();
  const params = {
    TableName: tableName,
    Item: userinfo
  };

  try{
    await dynamo.send(
      new PutCommand(params)
    );
  } catch(err) {
    console.log(err);
  }
}
The saveUser() custom function will take user’s information and save into DynamoDB table called ‘my-users-data’ using PutCommand function.
function buildHTTPResponse(msg, code = 200) {
  return  {
      statusCode: code,
      body: msg,
  };
}
Instead of returning the response object multiple times inside the core logic, we have introduced a function buildHTTPResponse. That will take message and the HTTP status code. We laverage this function inside our handler function.
export async function handler(event) {

  let s3BucketName = event['Records'][0].s3.bucket.name;
  let fileKey = event['Records'][0].s3.object.key;

  if( allowedBuckets.indexOf(s3BucketName) <0 ) return;
  let fileInfo = { Bucket: s3BucketName, Key: fileKey };

  console.log(fileInfo);

  let s3FileGetCommand = new GetObjectCommand(fileInfo);
  let s3FileResponse = await s3Client.send(s3FileGetCommand);

  let data = await s3FileResponse.Body.transformToString();
  let userData = null;

  try {
    userData = JSON.parse(data);      // converting string to JSON
  } catch(err) { return; }

  if(!userData.length) {
    let msg = `File ${fileKey} contains no data!`;
    return buildHTTPResponse(msg, 200);
  }

  const toBeSavedItems = userData.map(async (user) => {   // returning array of promises
    return saveUser(user);
  });

  await Promise.all(toBeSavedItems);

  console.log('all-data  ' , userData);

  return buildHTTPResponse('Success', 200);
};
In this handler function we are doing following:
- Capture the s3 bucket name and the file.
- Converting the file data to JSON
- Then, creating a array of promises (toBeSavedItems) that will create multiple users.
- Finally, will resolve the promisis using Promise.all method. With this, data will be saved into DynamoDB.
Step 6: Test The Pipeline
In order to test the pipeline, we will upload a json file ‘users.json‘ file into our s3 bucket. The users.json file will have some dummy user’s data like below:
[
    {
      "id": 1,
      "name": "Leanne Graham",
      "username": "Bret",
      "email": "Sincere@april.biz",
      "phone": "1-770-736-8031 x56442",
      "website": "hildegard.org"
    },
    {
      "id": 2,
      "name": "Ervin Howell",
      "username": "Antonette",
      "email": "Shanna@melissa.tv",
      "phone": "010-692-6593 x09125",
      "website": "anastasia.net"
    }
]
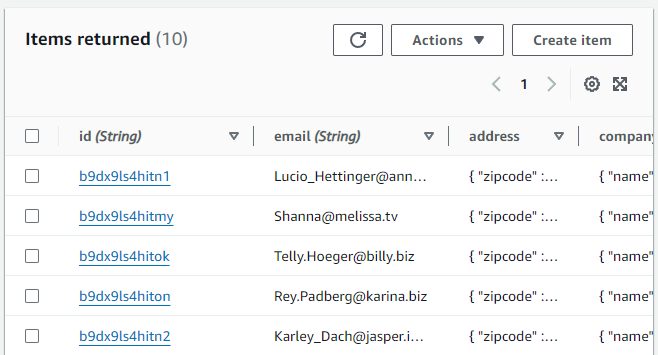
If everything goes file this file upload will trigger the Lambda function we have created and the function will save these information to DynamoDB. At anytime, if you face any issue, you can obserb the CloudWatch logs. Once, file is uploaded, you can check the data inside the DynamoDB table.

Conclusion
By leveraging the capacities of Amazon S3, AWS Lambda, and DynamoDB, you can make a consistent data pipeline for transferring, handling, and putting JSON records. This serverless design gives a versatile and practical answer for taking care of information ingestion undertakings in the cloud. As you keep on refining your application, consider integrating blunder taking care of, logging, and extra safety efforts to upgrade its power and unwavering quality. Happy Coding 🙂

